Saturday, April 25, 2015

April Purchase (2) - KO DX Titan Sword ( Kamen Rider Kuuga ) 2nd Purchase

A surprise find while casual walking around the neighbourhood after brunch today... At a small toy kiosk... The KO DX Titan Sword from Kamen Rider Kuuga series!!! Costs SGD10.90, it came packaged with 2 KO KR figurines... This is the 2nd time I am buying a KO of this toy, and the colours are more different this time compared to the 1st purchase... In addition to a orange transparent jewel cap on the sword hilt, the extendable blade now comes in 1 whole piece cast in orange transparent plastic, and the stickers are missing... The blade still can be pressed in and extended out with the push of a button at the handle... Lots of plastic edges not trimmed, but still, I think it is a very good KO...


A close up view of the sword and figurines (which I throw away after a minute of te-dombing)...


The back of the packaging... Hilarious heads!!!!! Hahahahaha....

Sunday, April 12, 2015

April Purchase (1) - DX Trailer Cannon, DX Drive Driver (2nd Buy)

Long time did not purchase... Sadly 65Daigou now refuse to 代购 toy guns anymore, including the DX Door Gun and DX ToQ Blaster, which don't resemble any real firearms at all... sigh... anyway, decided to go to CSC to see if got any good buys for my little nephew...
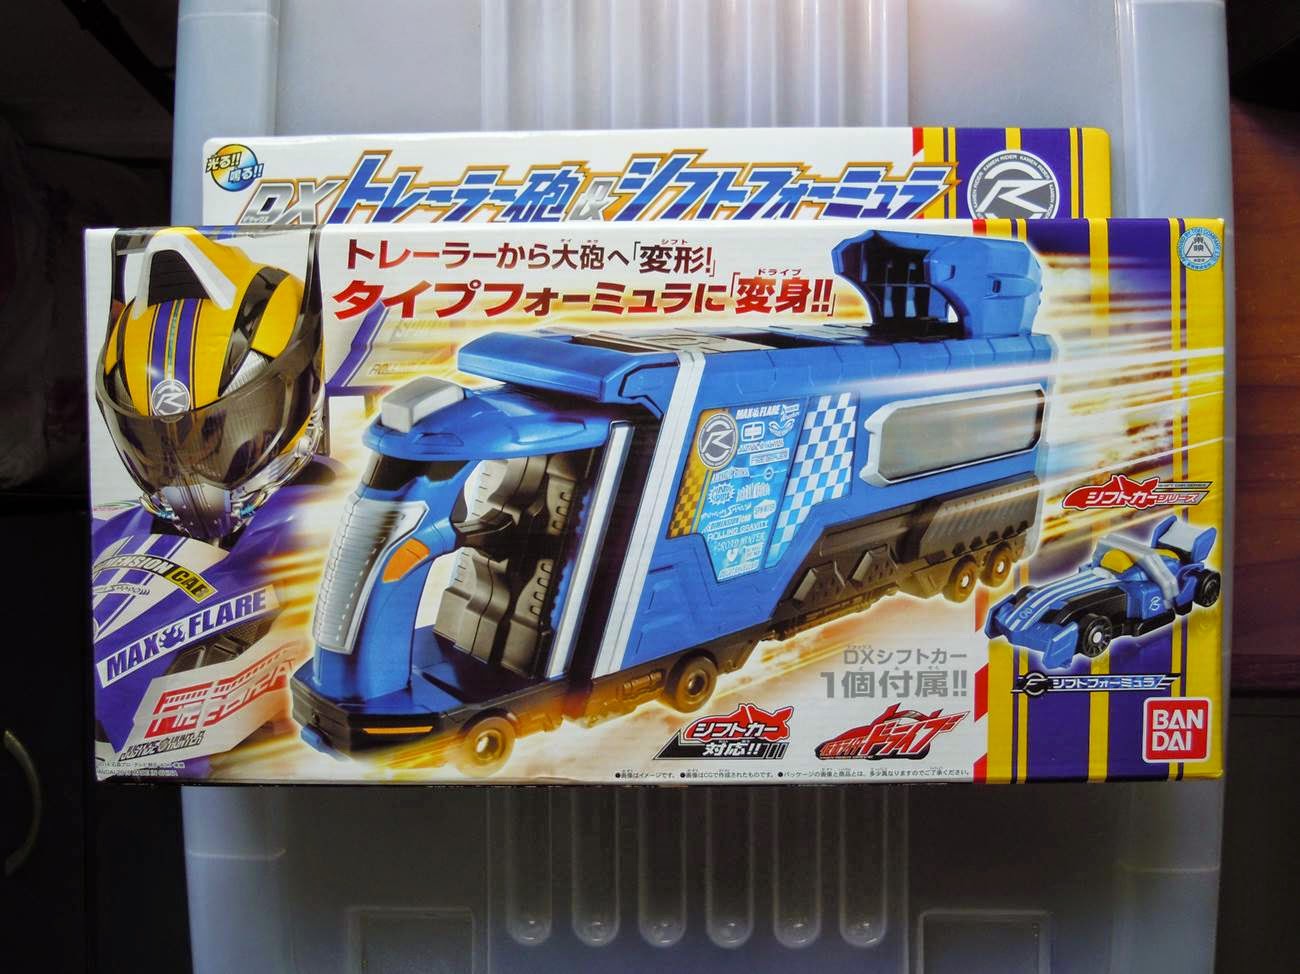
DX Trailer Cannon
Got it at $85, after a $5 discount from the stall owner, thank you thank you! Very heavy, and not sure if my little nephew will like it or handle it well, as it is quite heavy... anyway, quite a good piece of toy...


And de-tombed... Aiyoh, 1 shift car only... but hey, it is the (currently) most powerful shift car!!! Hahahaha.... Fortunately it has car-reading function, so not too bad...


DX Drive Driver (2nd Buy)
And bought for the 2nd time, the DX Drive Driver!!! For myself!!! Because very cheap!!! At only $60, after a $5 discount again!!! Hahahaha.... Actually the fact is I ask the stall owner if he can give me a lower price if I buy both the DX Trailer Cannon and DX Drive Driver... Got a total of $10 discount, happy... hahahaha... But frankly, am quite surprised with the dipping price of the DX Drive Driver, which utilizes more technology as compared to most of the previous KR henshin belts... Anyway, is a good (and sensible) thing... OK, need to find a red belt to replace the short plastic straps!!!


And de-tombed... Wah, now I got 2 Max Flare shift cars... Nevermind, I probably will mod the candy toy one into Formula... and maybe I can mod the Type Speed shift car into an adjustable mode car!!!!!! Hahahaha... possible, possible...


And because this is the "1st Edition" (???) version, it comes with a special Gambaride card... Probably will stick some barcode on it to let the DX Diendriver to read the card... maybe a 'Final Attack Ride' ???


Also got a free KR Chalice Head display... thank you!!!

Wednesday, April 1, 2015

Update : Kamen Rider V3 Double Typhoon Belt - Single Switch Activation

Updated my previous Kamen Rider V3 - Double Typhoon Belt modification with a DPDT switch... Also took the chance to do some minor adjustments like position of the fan blade, rotation direction to be opposite, etc... Actually at this point I thought of re-modding my Kamen Rider Ichigo's Typhoon Belt using the speaker output to activate the motor, so that I need not switch off, but later decided against it as I prefer to keep the fan blades rotating at a constant speed... and thus also lazily repeated the same concept over to Double Typhoon Belt too... hahahahaha....


Also need to cut a small piece of ABS to cover the gap previously used by the sound IC activation switch...


I also made a new battery cover as I had lost the original one previously...


Looks good!!!


And done... Happy...


And it now proudly displays with the rest of the belts...


And here's the demo clip of the mod...


Tuesday, March 31, 2015

Legend Rider "Modification" Series - Kamen Rider Ichigo : New Typhoon Belt Mod

A lot of "tears" are "shed" to cut the parts off the LRS Typhoon Belt...


The "jewels" are cut off and rims painted... Need to be careful to avoid scratching off the delicate paint which does not stick to the plastic well...


A small motor similar to the earlier V3 belt mod is used here to spin the fan blades... but had to "dig" up spaces to mount the motor, and while doing so, the fan blade is off-centered... The motor is wired to use roughly 1 battery (1.5V) only...


A DPDT Latch pushswitch is used to activate the fan and sound/light circuit with 1 press of the button... Because of the protruding switch, I decided to switch and make the side with switch to face down... gap at the switch is covered with a thin plastic covered with red insulation tape...


Testing... Looks good... But need to make the "fan blades" look more like blades...


... so I decided to paint the "gaps" except for 1 that I need to use a tape to stick on...


Nice....


Cut out a big hole for the battery compartment...


... and attach the base of the buckle to the belt strap using bolts and nuts...


Used the old narrow belt to do the tying up... The thicknesses of the 2 belt straps make it super difficult to sew, so screws and nuts are used...


... and the side boxes attached using cable ties... holes are manually drilled inside the boxes for the cable ties to go through...


Finally, the jewels are hot-glued to the strap...


Done!!!! Nice...


And as usual, a video clip of the final product...

Thursday, March 19, 2015

Update: DX Blay Buckle - Side Holster Pieces Attachment

After many years of struggle, I decided to bear with the pain and cut off DX Blay Buckle's side holster pieces... which I am reluctant to do so previously because I hope to keep the plastic belt straps intact in case I want to sell it off next time... Hence I cut off the pieces with a big penknife... quite easily done as the material is very soft...


Cable ties are used to secure the pieces to the belt strap after drilling some holes in the pieces to loop in the cable tie...


Done! DX Blay Buckle looks much nicer now - more show accurate and less plain...

Update: Legend Rider "Modification" Series - Kamen Rider Orga Driver Belt Strap

To complete the Legend Rider "Modification" Series Orga Driver, a belt strap is necessary, and hence the work begun... A slightly thin black belt is trimmed and used as the core belt...


A wide brown belt is then used for the main belt strap seen in the movie / CSM version... Slits are cut to slot in the black belt to create space for the side holster pieces... A fabric glue bought from Daiso is used to glue the 2 belts together... hope they remain stick to each other...


A big dunno-what-name clip is used for the joining of the end parts of belt strap. As usual, one of the end part with clip has a velcro-attached piece for adjusting the strap length...


The side holster pieces are sprayed with gold paint (which does not stick well to the surface) and attached to the sides with cable ties... the cable ties are then painted...


Done!!! Took about 3 days and nights of hard work... Main regret is I positioned the side holster pieces too far away from the centre buckle, so does not look good when hung...


... with the henshin phone put in...


... Close up view of the strap... Happy... Now all my Kamen Rider Henshin belts are all done... Don't think I am getting anymore new belts, though I am still eying the DX Meteor Driver... if it drops to a good sales price ($35??!!)...

Wednesday, March 4, 2015

March Purchase (1) - Slugterra Build Up Pack : Eli's Blaster 2.0

Got this at TRU for my little nephew's birthday... which is 3 months later... hahaha... Costs $59.90...